NIC Teaming on an Asus X99 Deluxe II mainboard with the Intel I211 and I218V onboard NICs under Windows 10. (Deprecated)
Fixing No NetBIOS over TCP/IP
Windows 10 Updates v1809/v1903 and higher: See my guide to setting up NIC Teaming under Windows 10 v1903+ using Windows PowerShell and the Intel PROSET for Windows Powershell software module here.
Note: The NetBIOS issue appears to be fixed with the latest Intel Drivers starting with v23.2 so this procedure shouldn't be necessary now.
Warning: For ADVANCED USERS only.
This involves editing the registry which can result in completely disabling your PC operating system. Use at your own risk. I strongly recommend a full backup before beginning. (use this guide) You may not be able to roll these changes back easily so have a backup!
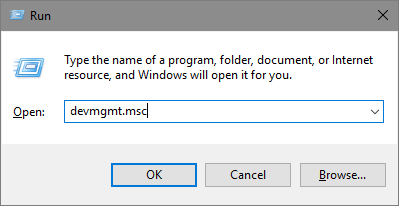
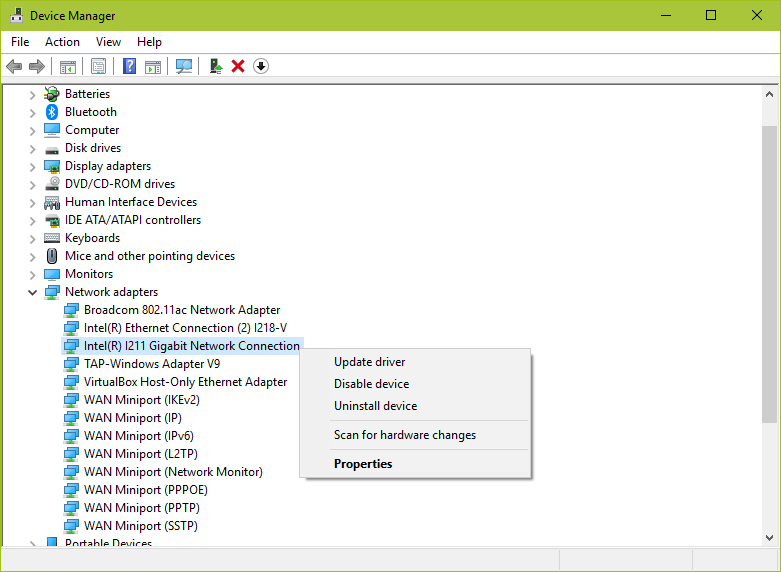
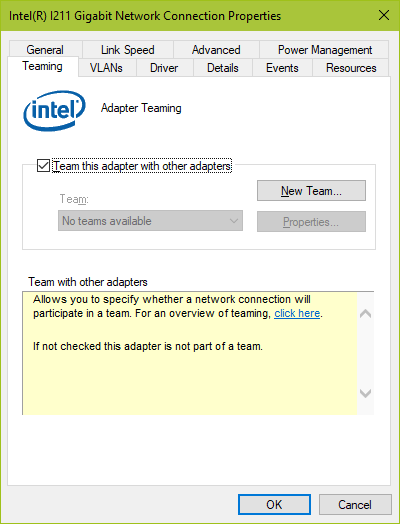
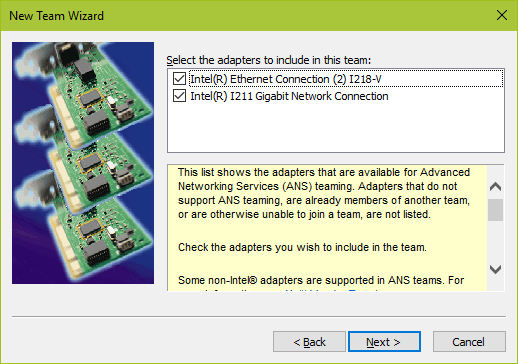
I can say, it didn't go smoothly and took me a month to finally find the right information to solve the problem of no NetBIOS over TCP/IP. I reproduce that here so others might not suffer. Asus currently available drivers for the X99 Deluxe II are old and don't support NIC Teaming under Windows 10 so I had to source the proper drivers from Intel directly. (Currently available here). After installing the drivers, you need to open Device Manager and create a Team. Run devmgmt.msc, open Network Adapters then right click on one of the adapters (I211 or I218V) and select Properties. Select the Teaming tab, check the Team this adapter with other adapters box and then press New Team then add the second adapter. So far so good. For me, everything seemed to be working at this point.
Open Device Manager
Open Network Adapter Properties
Create a New Team
Add the second adapter
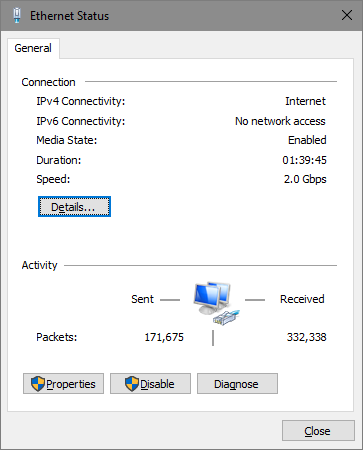
After a restart, some issues became evident. I could access the internet no problem. And I could access resources by their IP address. But my network shares weren't available (SAMBA) nor could I see any other PCs through network discovery. I couldn't access anything by the NetBIOS name and sure enough NetBIOS Over TCP was disabled and no registry hack or command line or GUI could seem to change that. AND breaking the team didn't fix it either. You can check if NetBIOS is operating by opening Network Connections (Run ncpa.cpl), highlight the Team adapter (Team #0 is the default), press the view status of this connection button then press details and look for NetBIOS over TCP Enabled. If it says no then the steps that follow may resolve the problem for you too.
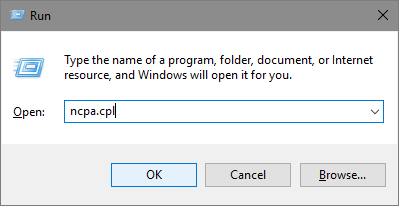
Open Network Connections
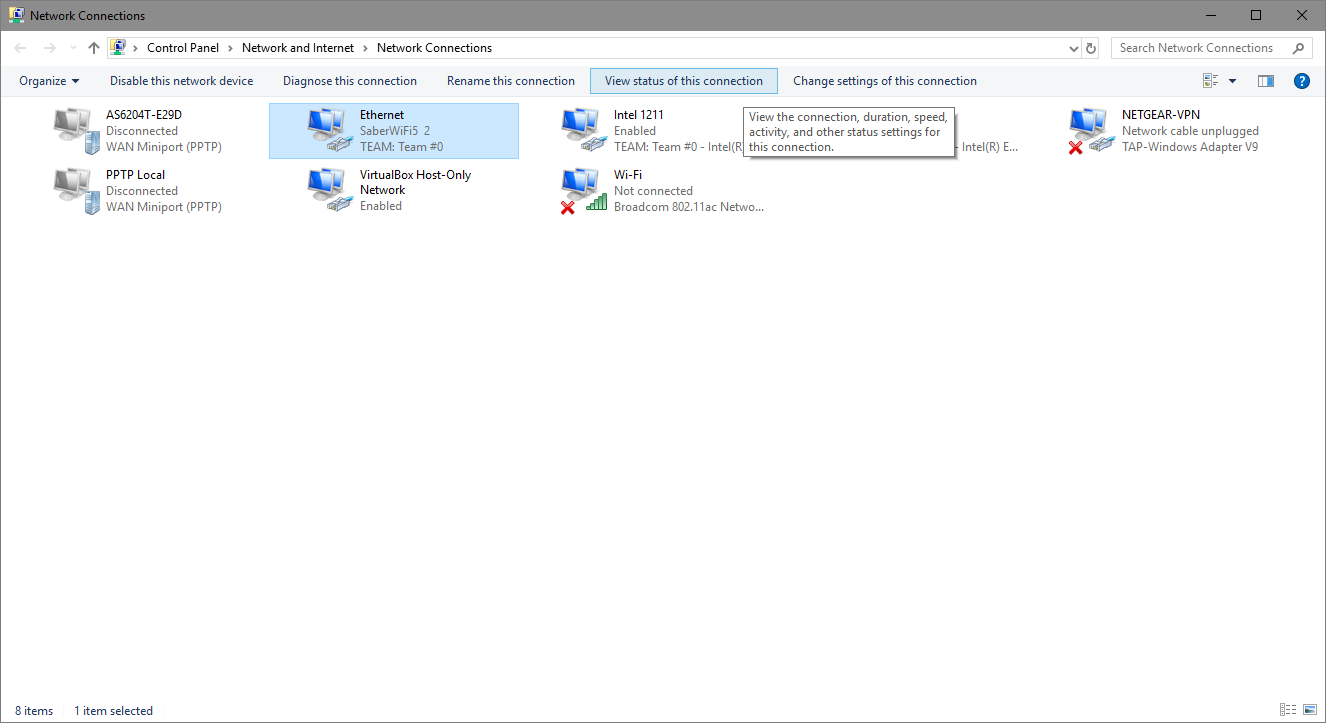
View status of Team #0
Click Details to check NetBIOS Over TCP
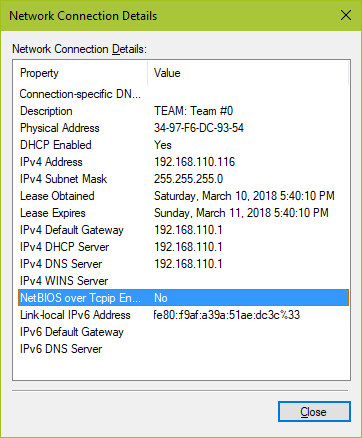
NetBIOS Over TCPIP Enabled is No
Okay, let me correct that, the common registry hack to turn on NetBIOS Over TCP didn't work but I did find there were some settings that needed to be checked and, if necessary, added to in order to get the NetBIOS working again. It seems that some registry NetBIOS related keys aren't getting properly updated to enable the NetBIOS Over TCP so I had to check and update them manually if they were missing the information. The Team adapter GUID, in particular, was missing from a number of keys.
At this point, let me remind readers to exercise caution and care in editing the registry or you could render your PC inoperable without re installing windows. Have a backup!
Before we can edit the registry we first need to find the GUID of the Team #0 adapter. To do this, open a Command Prompt and type the command "wmic nicconfig list" (without the quotes) and press enter. I found the GUID I was looking for next to an entry iANSMiniport. The GUID includes the braces { } and everything in-between. The lines are quite long so it can be confusing. If you click on the command prompt icon in the top left, you'll find some editing tools to mark and copy the GUID.

Use command line "wmic nicconfig list" to find the Team #0 GUID
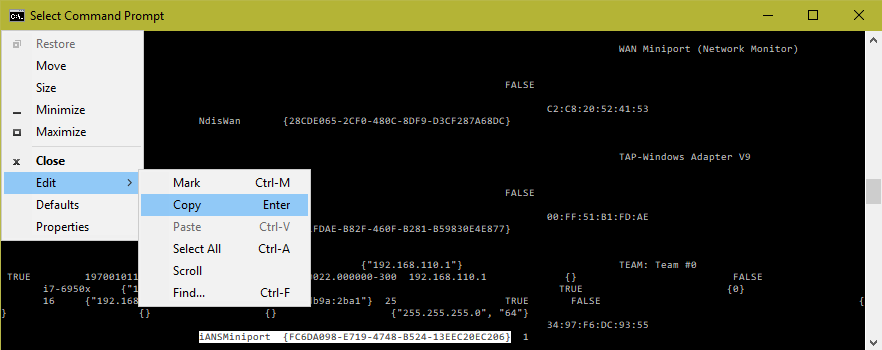
Mark and Copy the GUID next to iANSMiniport
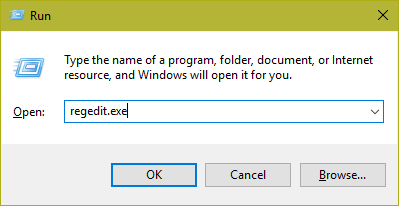
Open the registry editor
Next, we open the Registry Editor, regedit, locate each of the keys and check each of three entries for the GUID and if it's not there we have to add it following the same format as the other entries. As follows (substituting the actual GUID where it says GUID):
[HKEY_LOCAL_MACHINE\SYSTEM\CurrentControlSet\Services\lanmanserver\Linkage]
"Bind"=multi_sz: \Device\NetbiosSmb \Device\NetBT_Tcpip_GUID
"Export"= multi_sz: \Device\LanmanServer_NetbiosSmb \Device\LanmanServer_NetBT_Tcpip_GUID
"Route"= multi_sz: "NetbiosSmb" "NetBT" "Tcpip" "GUID"
[HKEY_LOCAL_MACHINE\SYSTEM\CurrentControlSet\Services\lanmanworkstation\Linkage]
"Bind"=multi_sz: \Device\NetbiosSmb \Device\NetBT_Tcpip_GUID
"Export"= multi_sz: \Device\LanmanWorkstation_NetbiosSmb \Device\LanmanWorkstation_NetBT_Tcpip_GUID
"Route"= multi_sz: "NetbiosSmb" "NetBT" "Tcpip" "GUID"
[HKEY_LOCAL_MACHINE\SYSTEM\CurrentControlSet\Services\NetBIOS\Linkage]
"Bind"=multi_sz: \Device\NetBT_Tcpip_GUID
"Export"= multi_sz: \Device\NetBIOS_NetBT_Tcpip_GUID
"Route"= multi_sz: "NetBT" "Tcpip" "GUID"
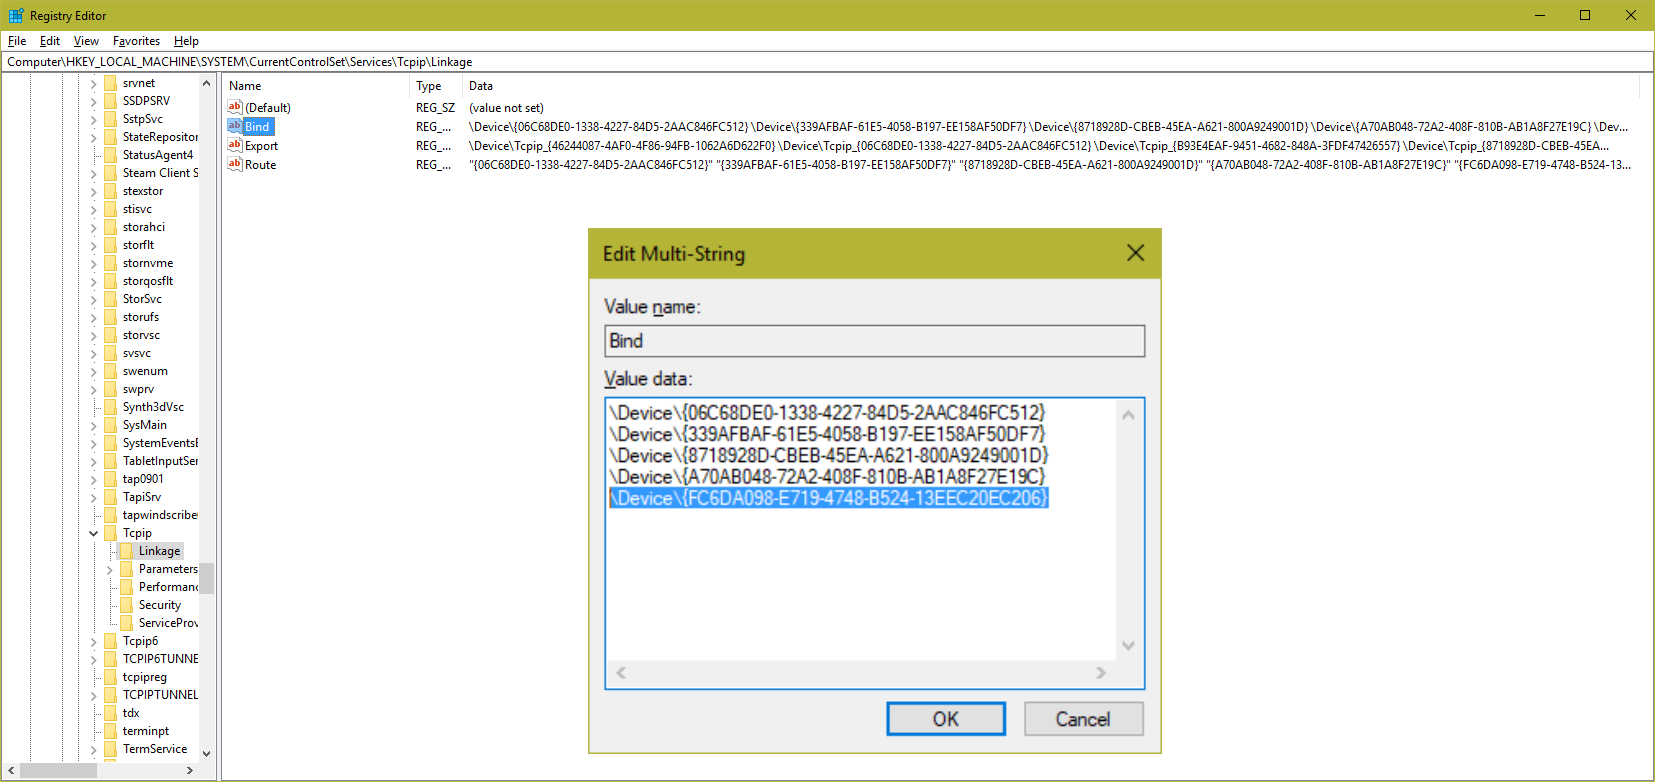
Add the GUID, match the format of the other entries
[HKEY_LOCAL_MACHINE\SYSTEM\CurrentControlSet\Services\NetBT\Linkage]
"Bind"=multi_sz: \Device\Tcpip_GUID
"Export"= multi_sz: \Device\NetBT_Tcpip_GUID
"Route"= multi_sz: "Tcpip" "GUID"
[HKEY_LOCAL_MACHINE\SYSTEM\CurrentControlSet\Services\NetBT\Parameters\Interfaces\Tcpip_GUID]
"NameServerList"= multi_sz:””
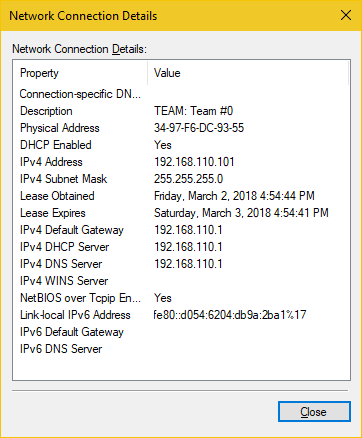
NetBIOS over TCPIP Enabled is Yes
[HKEY_LOCAL_MACHINE\SYSTEM\CurrentControlSet\Services\Tcpip\Linkage]
"Bind"=multi_sz: \Device\GUID
"Export"= multi_sz: \Device\Tcpip_GUID
"Route"= multi_sz: GUID
There should be other NICs listed in each entry so just follow the same format and you'll be good. Once the entries are complete, restart and NetBIOS Over TCP should now be enabled on Team #0 and everything working right.
Related